azure-ad
Azure AD / Entra ID Configuration
Configure Microsoft Entra ID (Azure AD) as an identity provider for DuoKey Cockpit
Overview
This guide walks you through configuring Microsoft Entra ID (formerly Azure Active Directory) as an identity provider for DuoKey Cockpit. Once configured, your users can authenticate to Cockpit using their Microsoft corporate credentials.
Prerequisites
- Admin access to Microsoft Entra ID (Azure AD)
- Admin access to DuoKey Cockpit
- Your Cockpit domain URL (e.g., yourcompany.duokey.cloud)
Part 1: Azure Portal Configuration
Step 1: Register a New Application
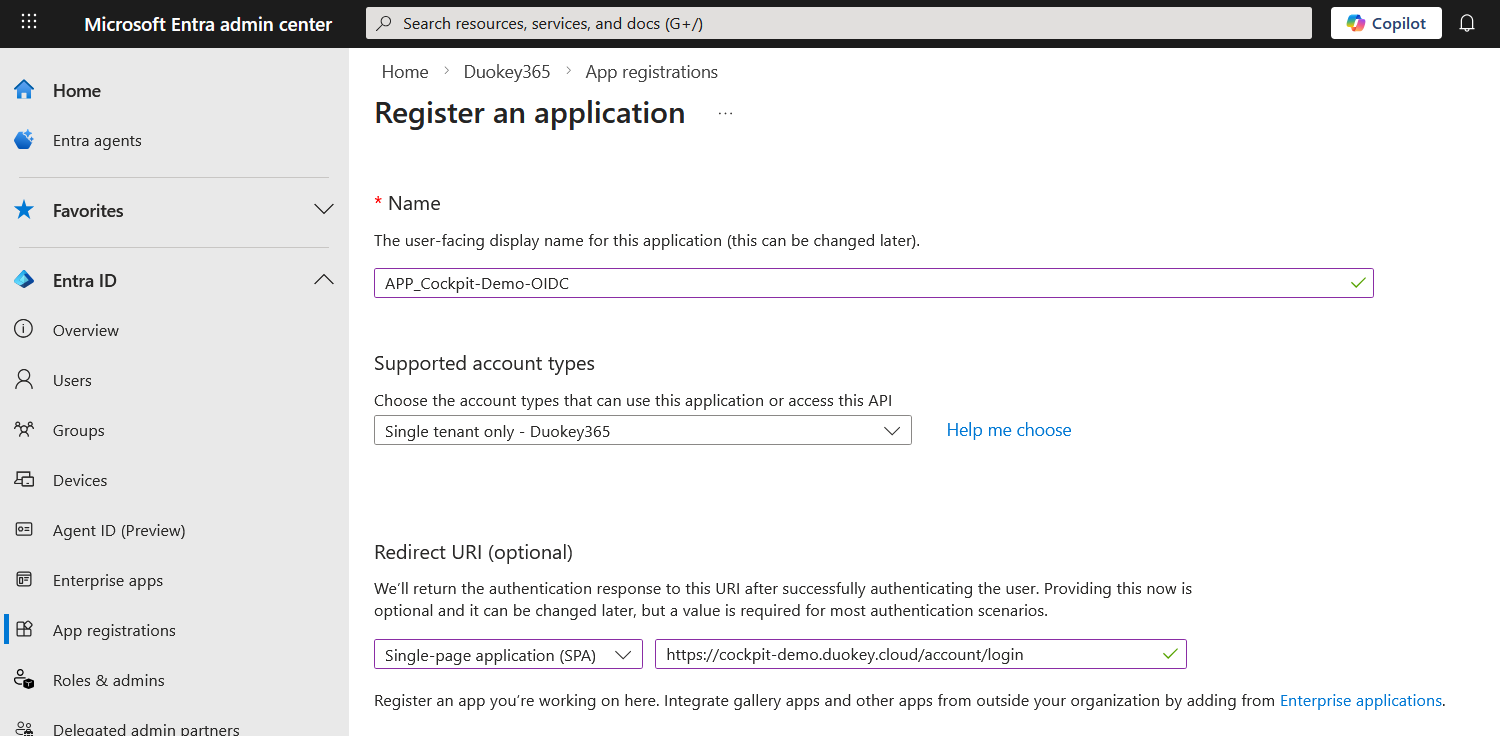
Navigate to the Microsoft Entra admin center and create a new app registration.
Open App Registrations
Enter Application Name
APP_Cockpit-Demo-OIDC)Select Account Type
Set Redirect URI
Register
Step 2: Create a Client Secret
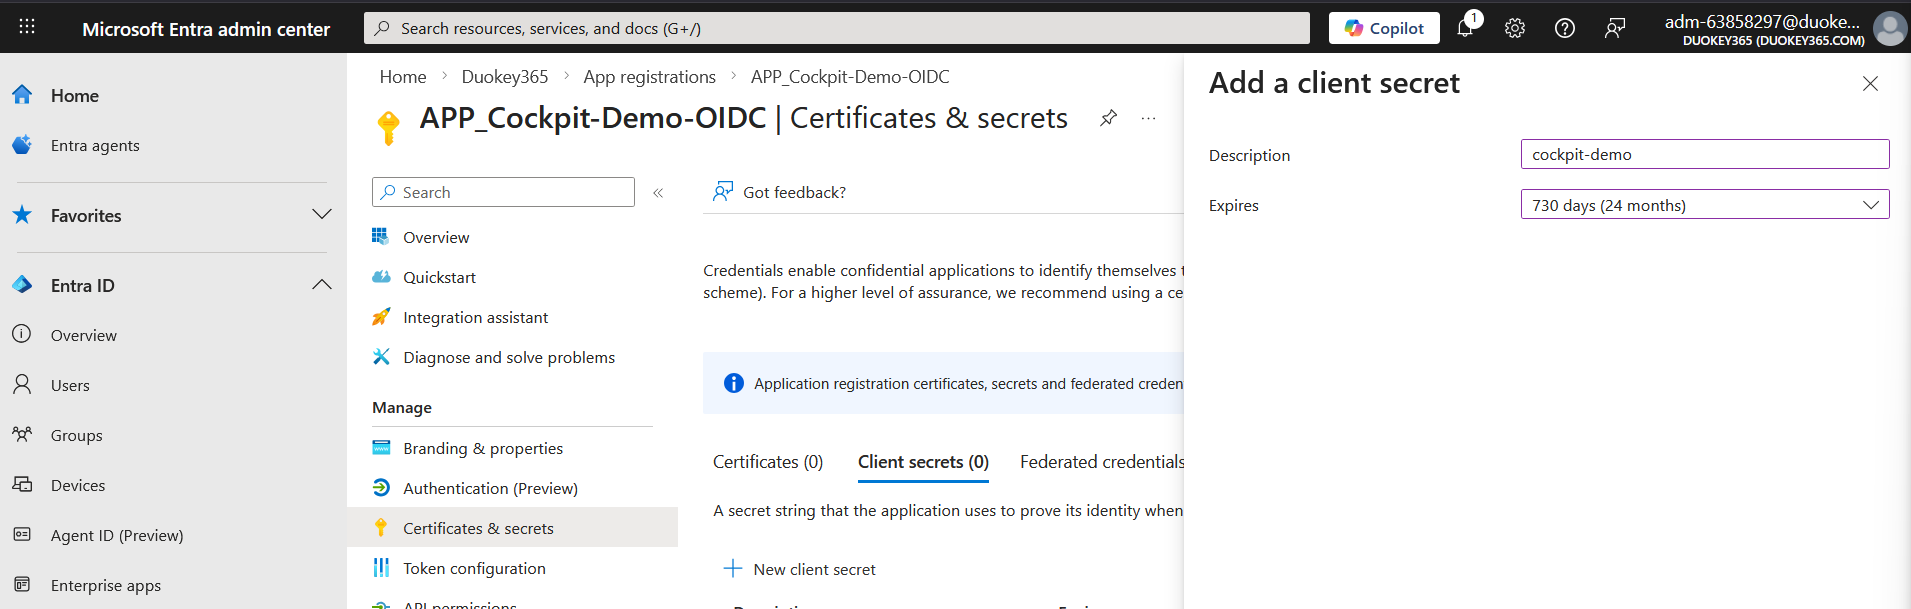
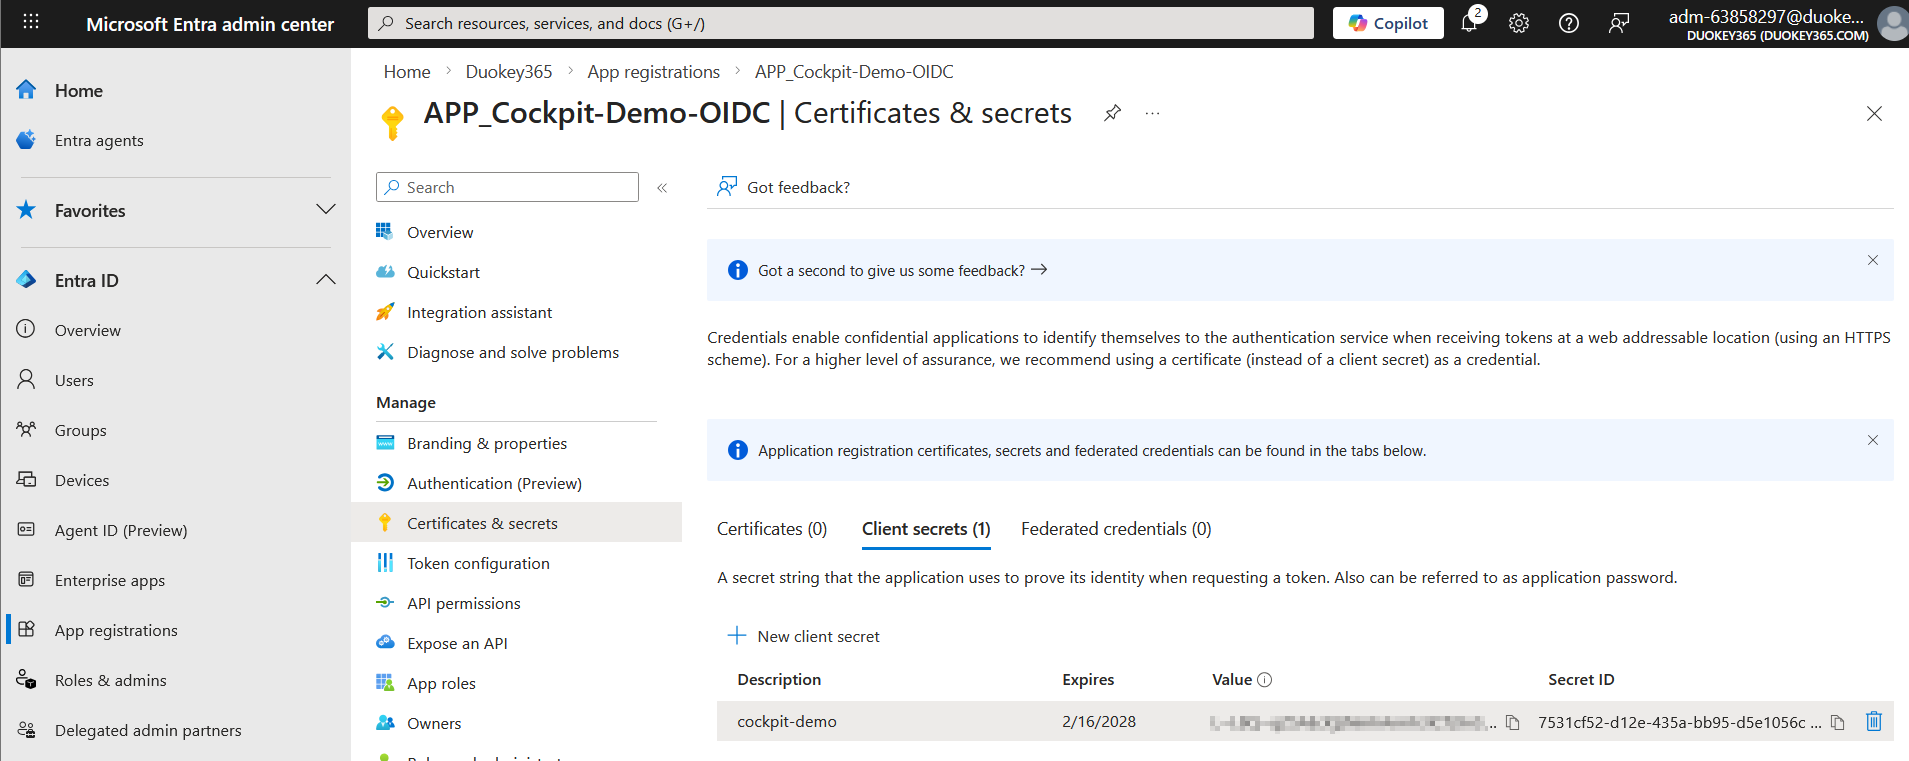
Navigate to Certificates & Secrets
New Client Secret
Configure
cockpit-demo) and select an expiration periodClick Add
Step 3: Configure Token Claims
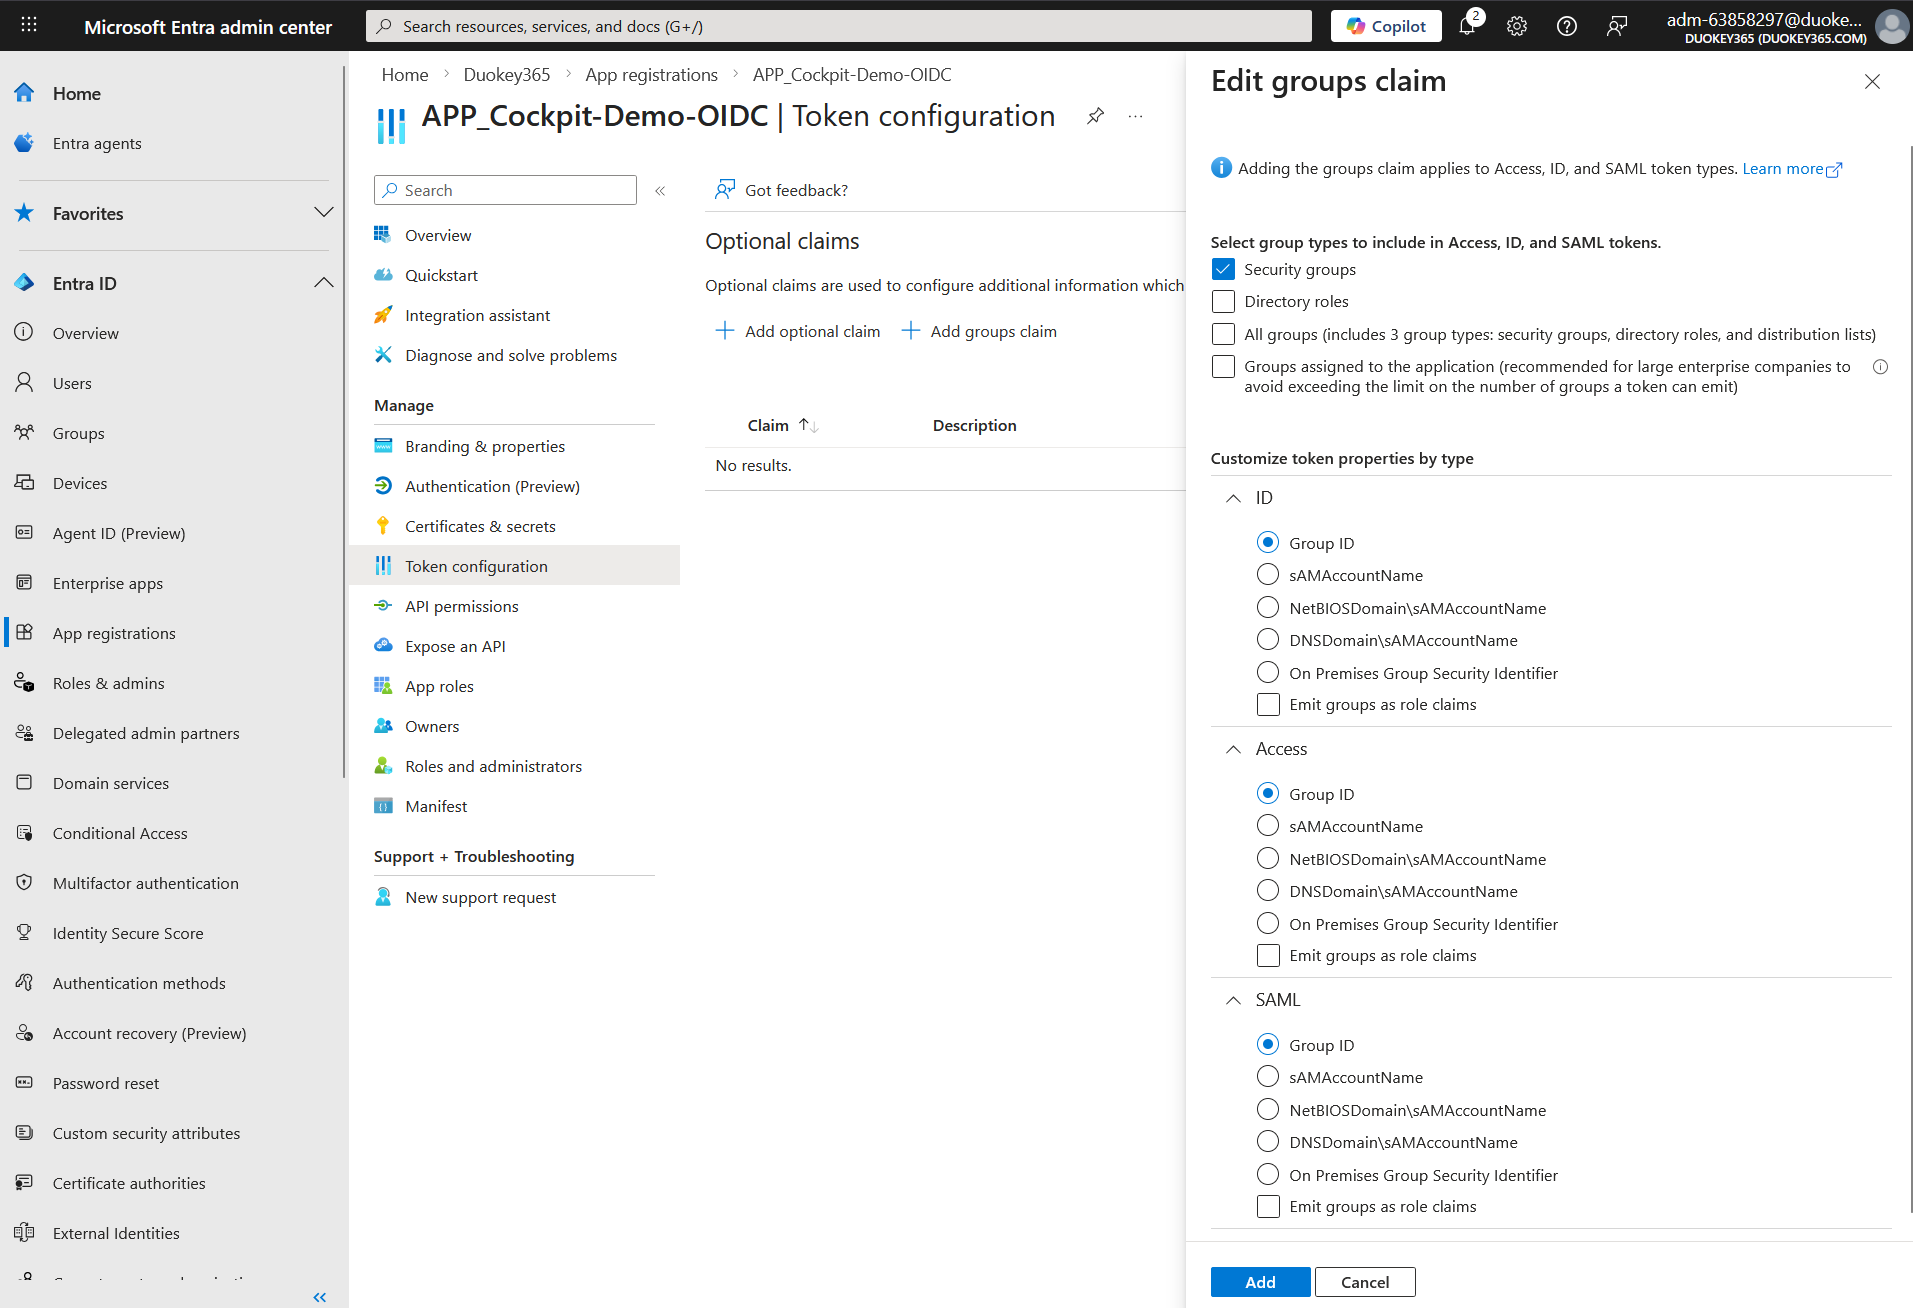
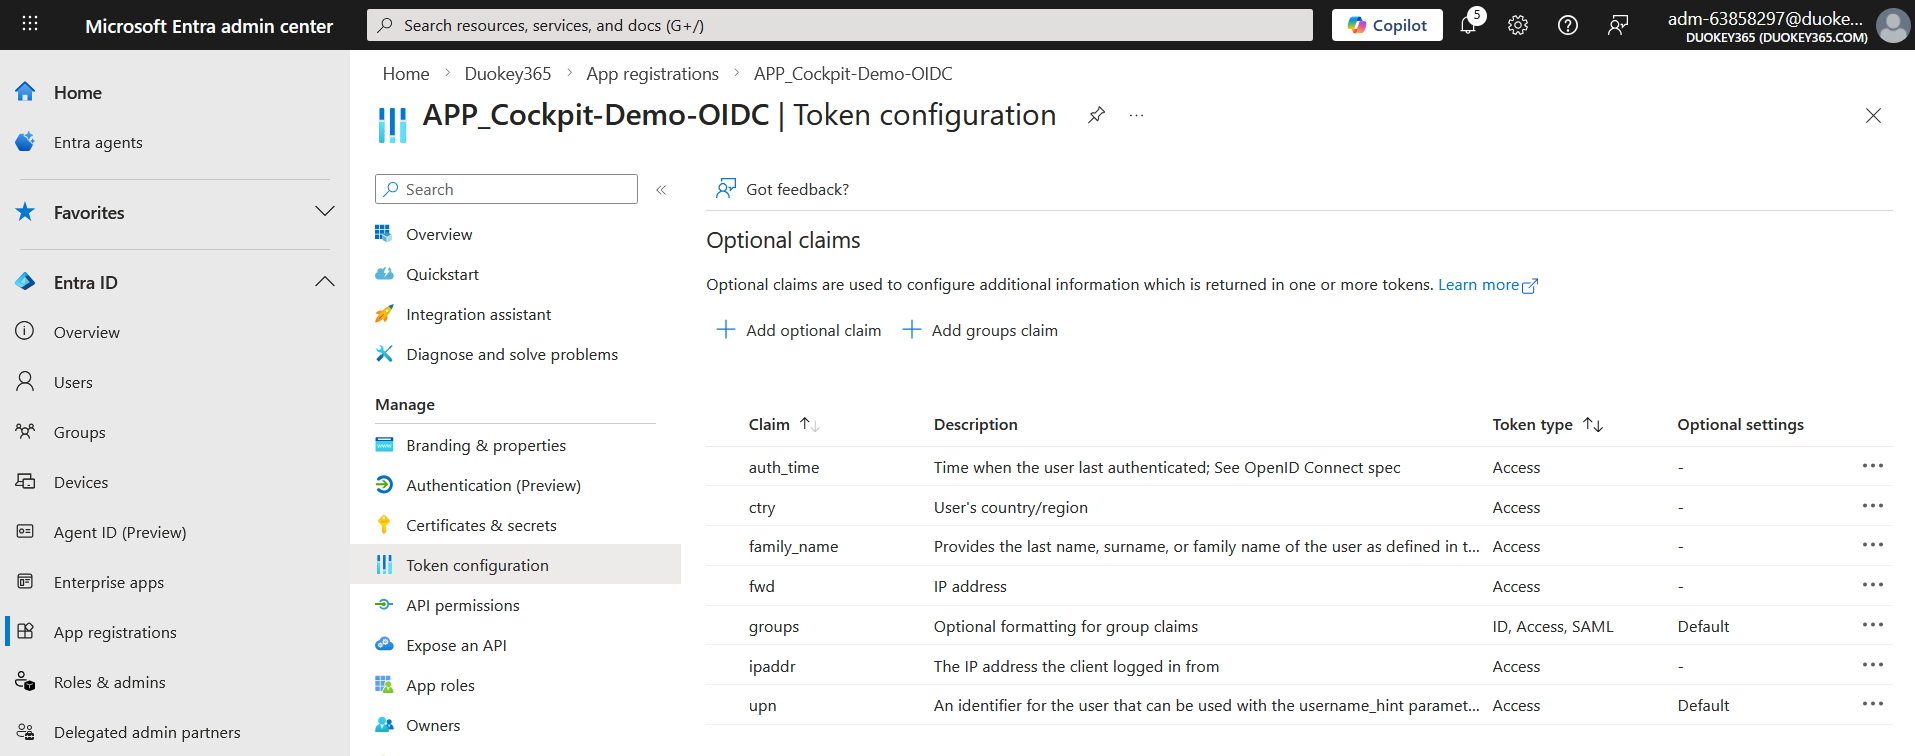
Navigate to Manage > Token configuration to add groups and optional claims.
3a. Add Groups Claim
Add Groups Claim
Select Security Groups
Click Add
3b. Add Optional Claims
Add Optional Claim
Select Claims
auth_time, ctry, email, family_name, ipaddr, fwd, upnEnable Graph Permission
After adding all claims, the Token configuration page should show:
Step 4: Configure API Permissions
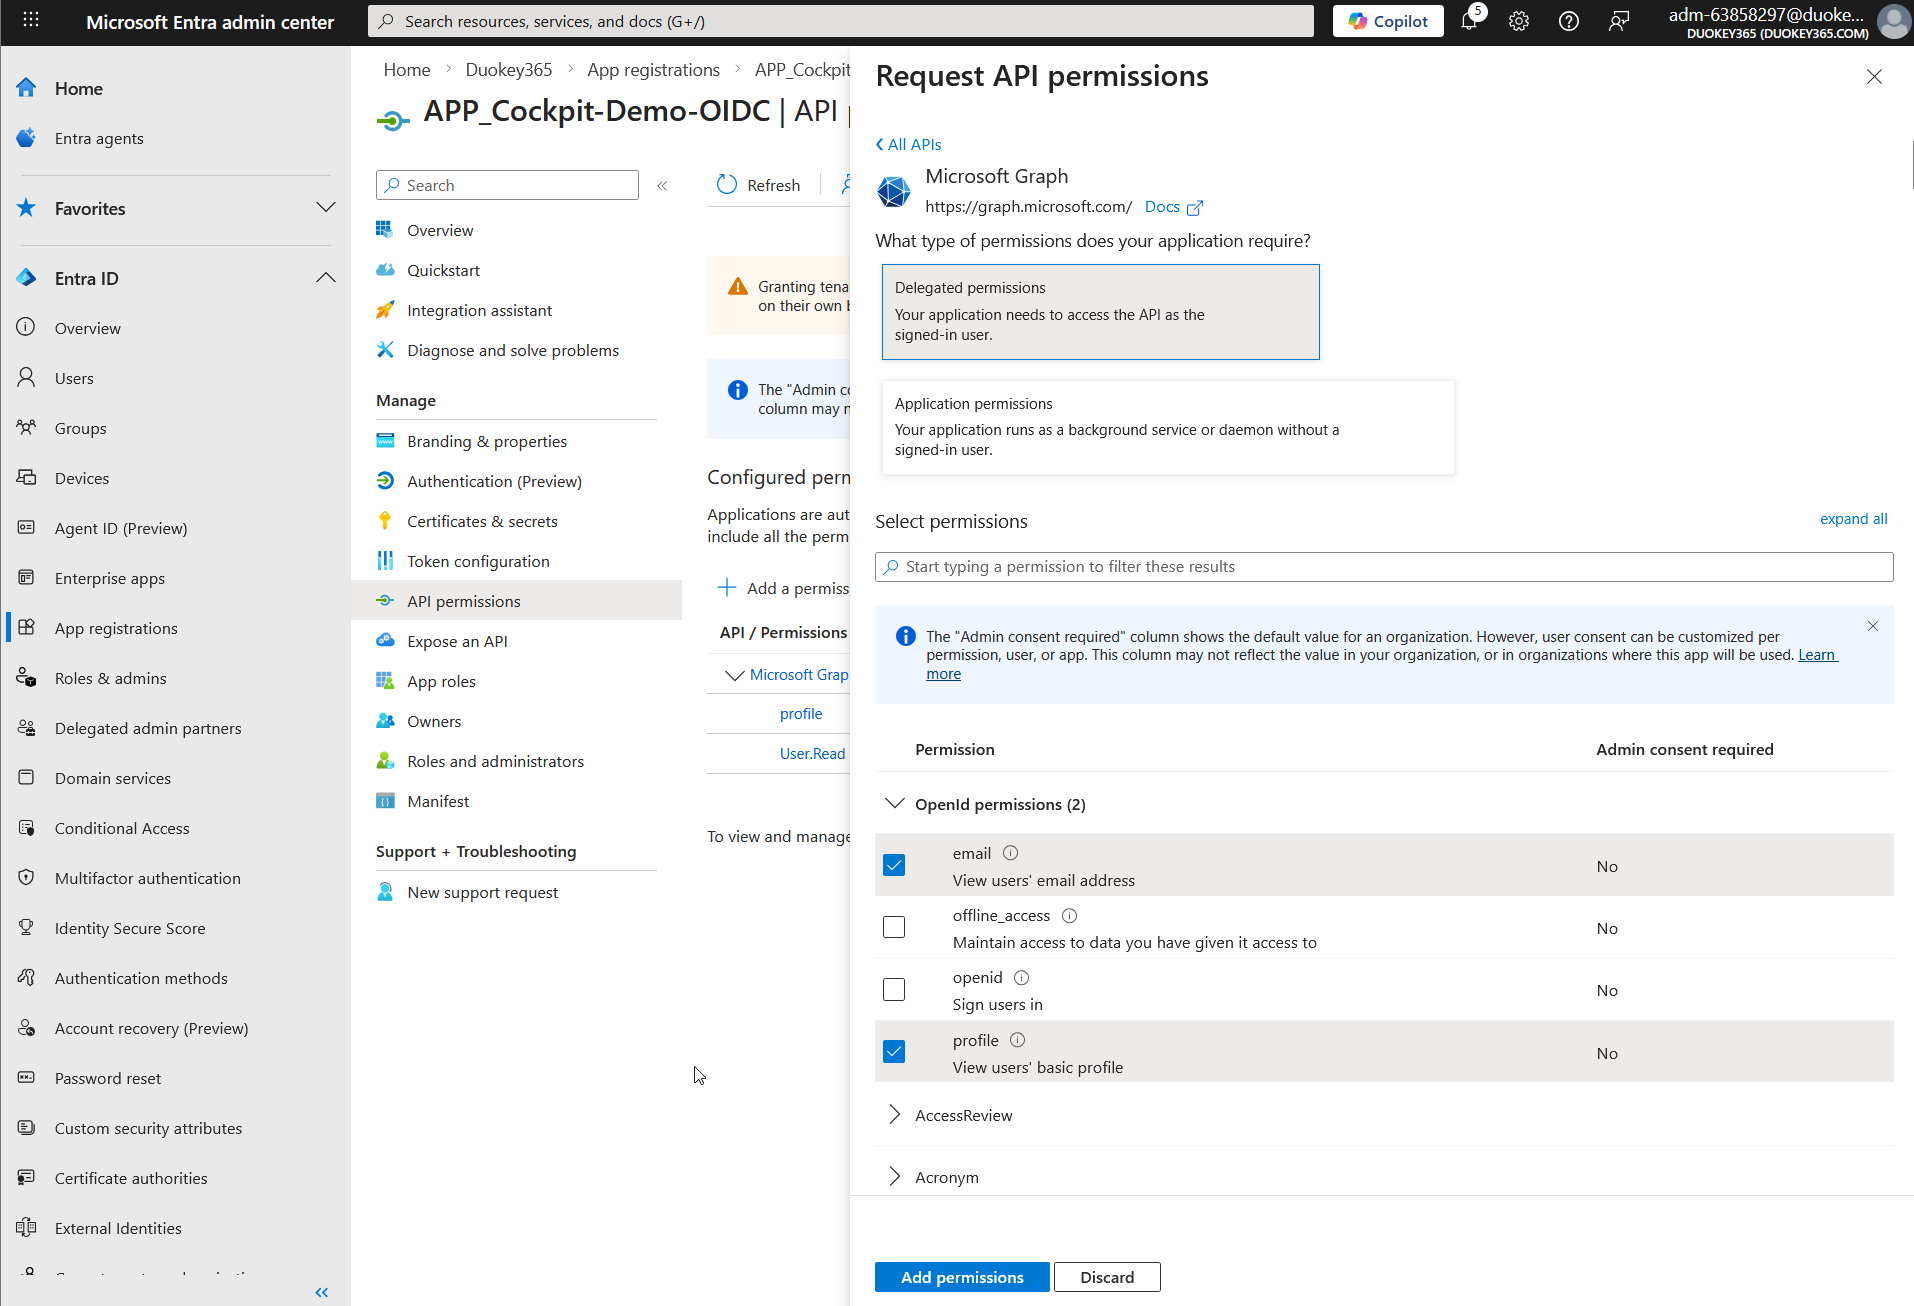
Navigate to Manage > API permissions to add the required Microsoft Graph permissions.
Add Delegated Permission
Add Application Permission
Step 5: Grant Admin Consent
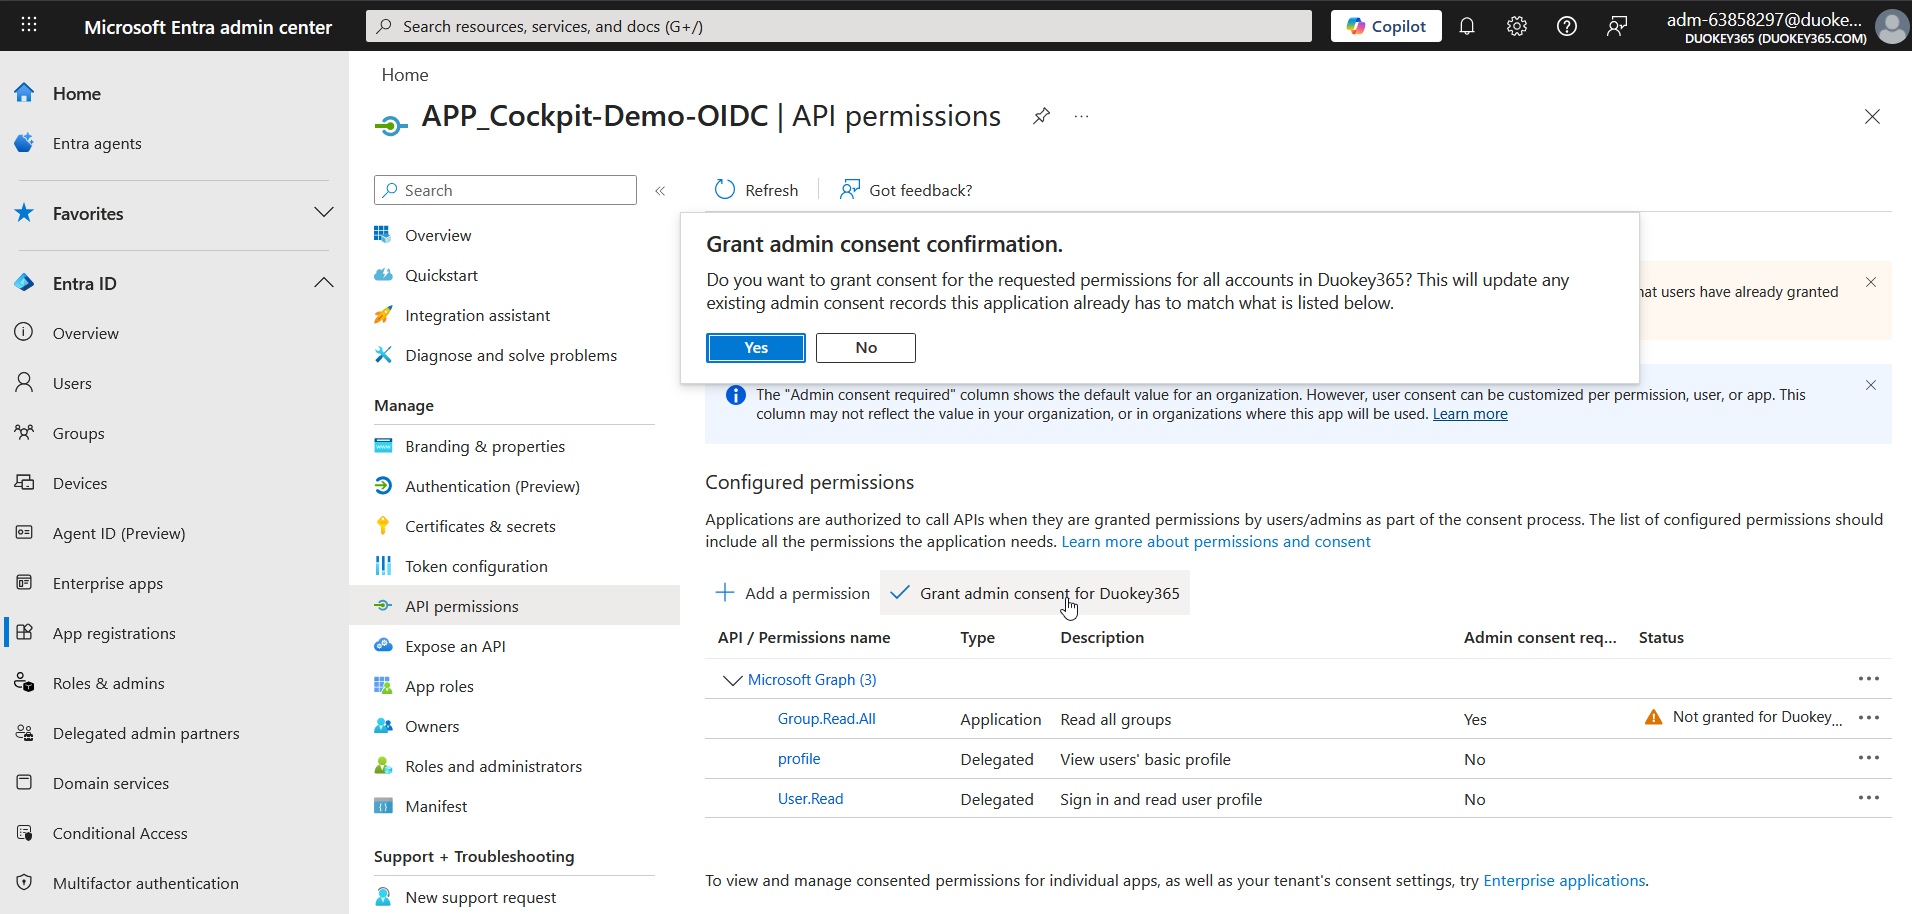
Grant Consent
Confirm
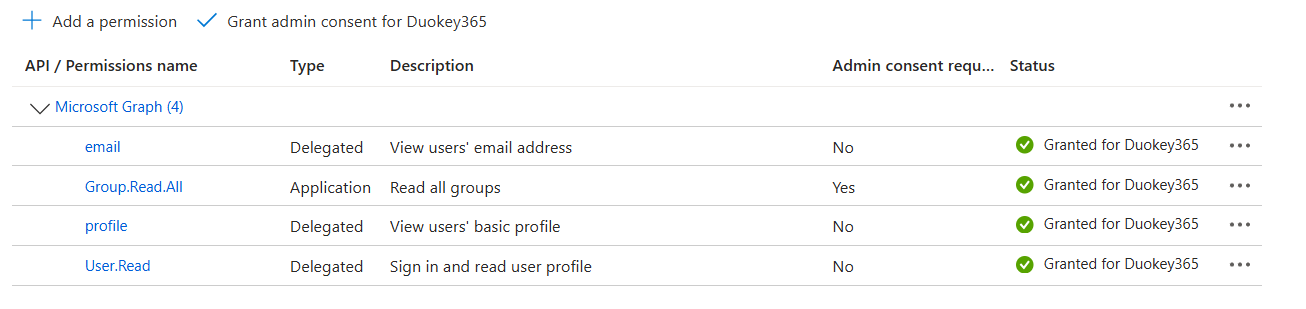
All permissions should now show a green Granted status:
Part 2: DuoKey Cockpit Configuration
Step 1: Access Identity Providers
Login to Cockpit
Navigate to Identity Providers
Create New IDP
Step 2: Select Azure AD
Select Azure AD from the available identity provider options and click Install Now.
Step 3: Configure Azure AD Connection
Fill in the configuration form with the values from your Azure AD setup:
| Field | Value |
|---|---|
| Integration Name | A friendly name (e.g., "Azure IDP DuoKey") — displayed on the login screen |
| Well Known Configuration | https://login.microsoftonline.com/{tenant-id}/v2.0/.well-known/openid-configuration |
| Client ID | The Application (client) ID from Azure AD app registration |
| Client Secret | The client secret value you copied in Step 2 |
| Scope | openid, profile, email (pre-filled) |
| Validate Issuer | Checked |
| Response Type | code, token, id_token (all checked) |
Add Claims Mapping
In the Claims Mapping section at the bottom of the form, add the following mapping:
Claim Key:
http://schemas.xmlsoap.org/ws/2005/05/identity/claims/name
Claim Value:
http://schemas.xmlsoap.org/ws/2005/05/identity/claims/emailaddress
Click Add to save the mapping.
Step 4: Test and Submit
Test Connection
Submit
Step 5: Enable the Identity Provider
The IDP is created but needs to be enabled to appear on the tenant login screen.
Open Actions Menu
Select Enable
Confirm
Once enabled, the Is Enable column will show Yes:
The Azure AD login option will now appear on the Cockpit login screen for your tenant. Users can click it to authenticate with their Microsoft corporate credentials.
Configuration Summary
| Component | Value |
|---|---|
| Azure AD Platform | Single-page application (SPA) |
| Redirect URI | https://{yourCockpitDomain}/account/login |
| Well-known Configuration | https://login.microsoftonline.com/{tenant-id}/v2.0/.well-known/openid-configuration |
| Delegated Permissions | email, profile, User.Read |
| Application Permissions | Group.Read.All |
| Optional Claims (Access) | auth_time, ctry, email, family_name, ipaddr, fwd, upn |
| Groups Claim | Security groups (ID, Access, SAML) |
| Cockpit Scopes | openid, profile, email |
| Response Type | code, token, id_token |
| Claims Mapping | name → emailaddress |
| Protocol | OpenID Connect (OIDC) |
Troubleshooting
After making changes to your Azure AD app registration, allow a few minutes for the changes to propagate before testing.